The source code for this document can be found here.
In this document we’ll explore how Screens work in Zircon through some practical examples.
Screens are in-memory TileGrids. They have an internal representation of a grid and support all
functionality which is provided by one. They wrap your actual TileGrid and come with a display function which
makes their contents visible.
Multiple Screens can be attached to the same TileGrid object which means that you can have more than one screen
in your app and you can switch between them simultaneously by using the display method. Note that only one
Screen can be displayed on the actual screen at the same time. With Screens you can implement the View part of the
Model-View-Controller pattern.
Screens also let you use Components like Buttons and Panels. Let’s see how we can use Screens.
TileGrid tileGrid = SwingApplications.startTileGrid(
        AppConfig.newBuilder()
                .withSize(20, 8)
                .withDefaultTileset(CP437TilesetResources.wanderlust16x16())
                .build());

final Screen screen = Screen.create(tileGrid);
You can interact with a Screen in the same way as you would use a TileGrid. All the drawing operations work as expected. Running the following snippet:
TileGrid tileGrid = SwingApplications.startTileGrid(
AppConfig.newBuilder()
.withSize(20, 8)
.withDefaultTileset(CP437TilesetResources.wanderlust16x16())
.build());
final Screen screen = Screen.create(tileGrid);
final ColorTheme theme = ColorThemes.adriftInDreams();
final TileGraphics image = DrawSurfaces.tileGraphicsBuilder()
.withSize(tileGrid.getSize())
.withFiller(Tile.newBuilder()
.withForegroundColor(theme.getPrimaryForegroundColor())
.withBackgroundColor(theme.getPrimaryBackgroundColor())
.withCharacter('~')
.build())
.build();
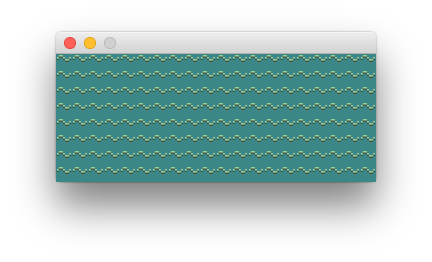
screen.draw(image, Position.zero(), image.getSize());
screen.display();
will result in this nice ocean:
Differences between Screens and TileGrids
Like a TileGrid a Screen has multiple layers of content.
There is a base layer which is modified when you use operations like setTileAt or draw. If the Screen is
displayed the changes will be visible on your screen at once. Note that if you call display on another
Screen the previous Screen is detached from the underlying TileGrid so you won’t see its changes.
Above the base layer there are the component layers. These are not present in TileGrids since only Screens implement the ComponentContainer interface. When you add or remove components to a Screen you implicitly modify these layers and the Screen is refreshed automatically. This also means that Components are basically specialized Layers.
As with TileGrids Screens support adding and removing Layers. Read the relevant documentation page to learn more.
When you display a Screen the component layers are swapped. This is handled internally and you needn’t worry about it.
Usage
Screen has one method, which makes its usage very simple:
display swaps the contents of its internal TileGrid with the one which you created by using an application
builder.
Use display when you want to overwrite all of the current contents of the TileGrid (for example if previously
another Screen was displayed on the TileGrid).
Here is how you can attach multiple Screens to a TileGrid and switch between them:
TileGrid tileGrid = SwingApplications.startTileGrid();

final Screen screen0 = Screen.create(tileGrid);
final Button next = Components.button()
        .withText("Next")
        .withPosition(8, 1)
        .build();
screen0.addComponent(next);

final Screen screen1 = Screen.create(tileGrid);
final Button prev = Components.button()
        .withText("Prev")
        .withPosition(1, 1)
        .build();
screen1.addComponent(prev);

next.handleComponentEvents(ComponentEventType.ACTIVATED, (event) -> {
    System.out.println("Switching to Screen 1");
    screen1.display();
    return UIEventResponse.preventDefault();
});
prev.handleComponentEvents(ComponentEventType.ACTIVATED, (event) -> {
    System.out.println("Switching to Screen 0");
    screen0.display();
    return UIEventResponse.processed();
});

screen0.setTheme(ColorThemes.adriftInDreams());
screen1.setTheme(ColorThemes.afterTheHeist());

screen1.display();
And it looks like this in action:

Components
The component system gives you easy-to-use Components like Buttons and Panels. You can read about how they work here.
Caveats
There are some caveats when working with Screens. When you display a Screen it is activated and it will
start listening to component-related events. Conversely if another Screen is displayed the currently displayed
one is deactivated so it won’t get any events. This means that any listeners / callbacks you attach to components
will only be fired if their parent Screen is active.
The component system does not handle resizing yet so you should either disable resizing or handle it by hand. Note that this feature is on the Roadmap and will be implemented later.