This article is part of a series.
Prev: «How To Make a Roguelike: #3 Generating Random Caves Next: How To Make a Roguelike: #5 Exploring the Cave »
With our cave in place the next thing to do is to add a Player to move around the cave. For this we’ll use Amethyst, a very simple ECS(ish) library.
Introducing Amethyst
Amethyst is a small library that enables you to modularize your application by letting you decompose them into Systems, Entities and Attributes in an easy-to-use manner. It is similar to anEntity Component System but it is a bit different in some important aspects.
The core abstraction in Amethyst is the Entity that encapsulates the internal state of our business objects and also their related operations. By using this concept we can maintain the Cohesion of our business objects while still retaining the flexibility.
So how does this work?, you might ask. Let’s take a look at a simple example.
Systems, Entities, Attributes
Let’s say that we’re creating a game with mythical creatures, and we want to add a goblin to our game.
If we think about how things can behave and change over time we can conclude, that there are essentially two ways:
internal, and external. For example a goblin can decide that it wants to explore a dungeon, or just take a
look around (internal change), or the player can decide to bash the goblin to a pulpy mass with their club
(external change). For this Amethyst has Systems in place:
/**
 * A [System] is responsible for updating the internal state of an [Entity].
 * The internal state is represented by [Attribute]s.
 */
interface System<C : Context>
There are several types of Systems, and for our discussion here we need to know about Behavior:
/**
 * A [Behavior] is a [System] that performs autonomous actions whenever
 * [update] is called on them.
 */
interface Behavior<C : Context> : System<C>
that lets our goblin interact with the world and Facet:
/**
 * A [Facet] is a [System] that performs actions based on the [Message] they receive.
 * Each [Facet] only accepts a single type of [Message] of type [M]. This enforces
 * that facets adhere to the *Single Responsibility Principle*.
 */
interface Facet<C : Context, M : Message<C>> : System<C>
that lets whe world interact with our goblin.
There is also
Actorwhich combinesFacetandBehavior. We’ll talk about it later.
When changes happen over time to an entity (our goblin in this example) its state might change.
To represent this, Amethyst gives us Attributes:
/**
 * An [Attribute] represents metadata about an entity that can change over time.
 */
interface Attribute
An Attribute can be anything that you add to your entity, from health points to stomach contents.
What’s important is that Attributes should never have behavior, they are supposed to be dumb data structures.
On the other hand, Systems should never have internal state. These two important rules allow us to compose Systems
and Attributes into Entity objects that are flexible, cohesive and safe to use.
The Entity itself is just a bag of Attributes and Systems:
interface Entity<T : EntityType, C : Context> : AttributeAccessor, FacetAccessor<C>, BehaviorAccessor<C> {

    val id: UUID
    val type: T
    val name: String
    val description: String

    val attributes: Sequence<Attribute>
    val behaviors: Sequence<Behavior<C>>
    val facets: Sequence<FacetWithContext<C>>

    suspend fun sendMessage(message: Message<C>): Boolean

    suspend fun receiveMessage(message: Message<C>): Response

    suspend fun update(context: C): Boolean
}
What’s interesting here is sendMessage, receiveMessage and update. It is not a coincidence that we have these in
Facet and Behavior! When an Entity receives a Message it will try to apply it to its Facets, and when an Entity
is updated it lets its Behaviors interact with the world. What world means in this context is up to you, that’s why
update takes a context object which can be anything. In our case it will contain our World for example.
Don’t worry if this seems a bit complex, we’ll see soon that the benefits of using such system outweigh the costs.
So how do these entities work together? We have Engine for that which handles them, so we don’t have to do it by hand:
interface Engine<T : Context> {

    /**
     * Adds the given [Entity] to this [Engine].
     */
    fun addEntity(entity: Entity<out EntityType, T>)

    /**
     * Removes the given [Entity] from this [Engine].
     */
    fun removeEntity(entity: Entity<out EntityType, T>)

    /**
     * Updates the [Entity] objects in this [Engine] with the given [context].
     */
    fun update(context: T): Job
}
As you can see the Engine is responsible for handling all your Entity objects and also for updating them.
We’ll take a look at how this works in practice below, so prepare your keyboard!
Adding Amethyst to our Project
In order to work with Amethyst we need to add it as a dependency to our project. When using a build tool like Gradle adding a library is much easier. Instead of downloading it by hand and copying the .jar file into a libs folder we just modify our build.gradle.kts file’s dependencies block like this:
implementation("org.hexworks.amethyst:amethyst.core-jvm:$amethyst_version")
In order for this to work we also need to load the version from gradle.properties so we add it at the top of build.gradle.kts next to Zircon:
val amethyst_version: String by project
The version itself goes into gradle.properties:
amethyst_version=2020.1.1-RELEASE
Now this will work if you compile your code with ./gradlew clean build, but we will also need to tell IDEA that something changed. On the right hand side there is a tab with the name Gradle. Click it, then click the “Reload all Gradle Projects” button. This should take care of our problem:
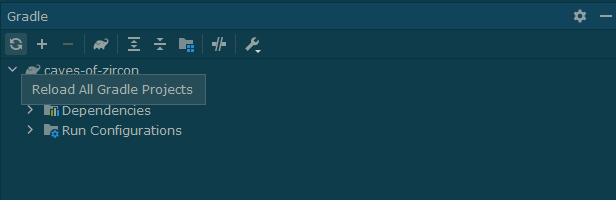 .
.
Troubleshooting IDEA
At some point you’ll run into problems when using IDEA. What you’ll see is that the code looks good, but when you start it from idea it won’t work. IDEA sometimes gets confused and we have to fix it.
The first step is to check what happens if we compile our program. We can do this by running the build from the CLI then starting the game:
./gradlew clean build && java -jar build/libs/caves-of-zircon.jar
If this starts the game properly, then the problem is with IDEA. If not, there is a PEBKAC situation. These are the things we can try to do in the former case:
- Restart IDEA
- Refresh the Gradle project (screenshot above)
- Run a clean build (
./gradlew clean build) - In the
Filedropdown clickInvalidate Caches and Restart - Delete the
outfolder (if it exists)
Hope this helps!
Enhancing our Game
The main goal of this tutorial session is to add a player to our Game which we can use to explore the dungeon, remember?
For this we’re going to need a player Entity and a context object which is used when updating the game world. The Context object is straightforward:
package com.example.cavesofzircon.world

import org.hexworks.amethyst.api.Context
import org.hexworks.zircon.api.screen.Screen
import org.hexworks.zircon.api.uievent.UIEvent

data class GameContext(
    val world: World,           // 1
    val screen: Screen,         // 2
    val uiEvent: UIEvent,       // 3
    val player: GameEntity<Player>
) : Context                     // 4
What we need for an update is:
- The world itself
- The
Screenobject which we can use to open dialogs and interact with the UI in general - The
UIEventwhich caused the update of the world (a key press for example) - The object representing the player. This is optional, but because we use the player in a lot of places it makes sense to add it here
Wait, what is this funky
<Player>thing? It is called generics which is supported by Kotlin. In case if you come from a dynamically typed language like Python this can be hard to grasp at first. I recommend reading about generics in general here and about Kotlin generics here.
Quick Detour: Typealiases and Extension Functions
You can read up on type aliases here and extension functions here if you need more information on the topic.
We’re going to use a typealias soon. Let’s explore what is a typealias and why is it useful!
A typealias can be used to give names (aliases) to otherwise complex or hard to read types. For example in our game we will only use a single Context object which is GameContext so it makes sense to pre-fill the second generic type parameter for Entity with our GameContext type so we don’t have to type it out every time:
typealias GameEntity<T> = Entity<T, GameContext>
What’s good is that we can now use GameEntity in our code anywhere where we would have used Entity<T, GameContext>. One advantage of this is that our code gets more readable. This is a good thing in itself but there is another reason to use typealias which we’re going to exploit. We can define extension functions on type aliases! This means that this code is perfectly valid:
fun GameContext.doSomething() {
    // do something
}
We’ll use this in the future for our advantage.
Note that
typealiasdoesn’t create a new type. It is just syntactic sugar.
Creating our First Entity
So what’s a GameEntity and Player? Let’s take a look at them:
package com.example.cavesofzircon.extensions

// put this in a file called TypeAliases.kt

import com.example.cavesofzircon.world.GameContext
import org.hexworks.amethyst.api.entity.Entity
import org.hexworks.amethyst.api.entity.EntityType

typealias AnyGameEntity = GameEntity<EntityType>

typealias GameEntity<T> = Entity<T, GameContext>
Now we can also fix GameContext with the following imports:
import com.example.cavesofzircon.attributes.types.Player
import com.example.cavesofzircon.extensions.GameEntity
Here we define GameEntity that is used to represent an Entity which uses our GameContext type parameter, and also AnyGameEntity which can be used to define functions later for all objects which are our game entities.
Player is an EntityType:
package com.example.cavesofzircon.attributes.types

import org.hexworks.amethyst.api.base.BaseEntityType

object Player : BaseEntityType(
    name = "player"
)
Each Entity in Amethyst must have an EntityType. This is necessary for easy identification of Entity objects. It looks like this:
interface EntityType : Attribute {

    val name: String

    val description: String
}
It is just a name and a description, and this type will also be added to our Entity as an Attribute later on. We used the BaseEntityType base class as you can see in the above code which is handy if we don’t want to type much.
There are some more things which our player needs. In fact all of our game entities will need them: a position and a tile!
Let’s create our first Attributes now, EntityPosition and EntityTile!
EntityPosition will hold the current position of an Entity:
package com.example.cavesofzircon.attributes

import org.hexworks.amethyst.api.base.BaseAttribute
import org.hexworks.cobalt.databinding.api.extension.toProperty
import org.hexworks.zircon.api.data.Position3D

class EntityPosition(
    initialPosition: Position3D = Position3D.unknown()
) : BaseAttribute() { // 1

    private val positionProperty = initialPosition.toProperty() // 2

    var position: Position3D by positionProperty.asDelegate() // 3
}
This is just a few lines of code, but there are some new concepts introduced here:
- We add
initialPositionas a constructor parameter to our class and its default value isunknown. What’s this?Position3Dcomes from Zircon and can be used to represent a point in 3D space (as we have discussed before), andunknownimpelments the Null Object Pattern for us. - Here we create a private
Propertyfrom theinitialPosition. What’s aPropertyyou might ask? Well, it is used for data binding. APropertyis a wrapper for a value that can change over time. It can be bound to otherPropertyobjects so their values change together and you can also add change listeners to them.Propertycomes from the Cobalt library we use and it works in a very similar way as properties work in JavaFX. - We create a Kotlin delegate from our
Property. This means thatpositionwill be accessible to the outside world as if it was a simple field, but it takes its value from ourPropertyunder the hood. I’ve written more about delegation here if you want more information on the topic.
EntityTile is an Attribute which holds the Tile of an Entity we use to display it in our world:
package com.example.cavesofzircon.attributes

import org.hexworks.amethyst.api.base.BaseAttribute
import org.hexworks.zircon.api.data.Tile

data class EntityTile(val tile: Tile = Tile.empty()) : BaseAttribute()
We are using Tile.empty() as a default value here.
Now we’re going to employ a little Kotlin trick and create some properties on AnyGameObject that will supply the position and tile of any of our entities!
package com.example.cavesofzircon.extensions

import com.example.cavesofzircon.attributes.EntityPosition
import com.example.cavesofzircon.attributes.EntityTile
import org.hexworks.amethyst.api.Attribute
import org.hexworks.zircon.api.data.Tile
import kotlin.reflect.KClass

var AnyGameEntity.position                                          // 1
    get() = tryToFindAttribute(EntityPosition::class).position      // 2
    set(value) {                                                    // 3
        findAttribute(EntityPosition::class).map {
            it.position = value
        }
    }

val AnyGameEntity.tile: Tile
    get() = this.tryToFindAttribute(EntityTile::class).tile

                                                                    // 4
fun <T : Attribute> AnyGameEntity.tryToFindAttribute(klass: KClass<T>): T = findAttribute(klass).orElseThrow {
    NoSuchElementException("Entity '$this' has no property with type '${klass.simpleName}'.")
}
Here we
- Create an extension property (works the same way as an extension function) on
AnyGameEntity. - Define a getter for it which tries to find the
EntityPositionattribute in ourEntityand throws and exception if theEntityhas no position. - We also define a setter for it which sets the
Propertywe defined before - Define a function which implements the “try to find or throw an exception” logic for both of our properties.
Typealiases, extension properties…why do we employ all this magic? If you have used an ECS library before you might have had the feeling that working with them is cumbersome and the resulting program won’t be readable in a way that it expresses the intent properly. What we do here is plumbing which we can use later to write actual game code which is readable and easy to understand. In other words this is the same concept as Plumbing and Porcelain in Git.
With this change now we can easily access the position and tile of any of our entities like this:
myEntity.position
myEntity.tile
This makes reading and writing code which works with entities much easier.
So far so good, but we still don’t see the player! Let’s create a Tile for the player and a factory object for creating entities now.
For the player Tile we’re going to add a nice color to GameColors:
val ACCENT_COLOR = TileColor.fromString("#FFCD22")
and the tile itself to GameTileRepository:
// don't forget the proper imports!

val PLAYER = Tile.newBuilder()
    .withCharacter('@')
    .withBackgroundColor(FLOOR_BACKGROUND)
    .withForegroundColor(ACCENT_COLOR)
    .buildCharacterTile()
For creating the actual player Entity we’ll have a factory object:
package com.example.cavesofzircon.builders

import com.example.cavesofzircon.attributes.EntityPosition
import com.example.cavesofzircon.attributes.EntityTile
import com.example.cavesofzircon.attributes.types.Player
import com.example.cavesofzircon.builders.GameTileRepository.PLAYER
import com.example.cavesofzircon.world.GameContext
import org.hexworks.amethyst.api.builder.EntityBuilder
import org.hexworks.amethyst.api.entity.EntityType
import org.hexworks.amethyst.api.newEntityOfType

fun <T : EntityType> newGameEntityOfType(
    type: T,
    init: EntityBuilder<T, GameContext>.() -> Unit
) = newEntityOfType(type, init)                          // 1

object EntityFactory {                                   // 2

    fun newPlayer() = newGameEntityOfType(Player) {      // 3
        attributes(EntityPosition(), EntityTile(PLAYER)) // 4
        behaviors()
        facets()
    }
}
If you are wondering what the dot (
.) means in this funky code:EntityBuilder<T, GameContext>.() -> Unitthen read on the topic of receivers here. The TL;DR is that thisinitfunction we pass will be run in the context of anEntityBuilder, eg:thiswill be bound to it, just like in our extension functions we created earlier.
We’re going to use EntityFactory in the future to create all our Entity objects. What happens here is:
- We add a function which calls
Entities.newEntityOfTypeand pre-fills the generic type parameter forContextwithGameContext. - We define our factory as an
objectsince we’ll only ever have a single instance of it. - We add a function for creating a
newPlayerand callnewGameEntityOfTypewith our previously createdPlayertype. - We specify our
Attributes,Behaviors andFacets. We only haveAttributesso far though.
Firing up the Engine
So now that we have the means of creating Entity objects we’re going to put the Engine somewhere which will take care of them. For now this will belong to World. We’ll also enable our GameBlocks to hold onto entities since most of the time we’ll be interested in checking whether a given block has an Entity or not. Let’s take a look at what we’ll need to change:
The GameBlock now contains entities:
package com.example.cavesofzircon.blocks

import com.example.cavesofzircon.builders.GameTileRepository.FLOOR
import com.example.cavesofzircon.builders.GameTileRepository.PLAYER
import com.example.cavesofzircon.builders.GameTileRepository.WALL
import com.example.cavesofzircon.extensions.GameEntity
import com.example.cavesofzircon.extensions.tile
import kotlinx.collections.immutable.persistentMapOf
import org.hexworks.amethyst.api.entity.EntityType
import org.hexworks.zircon.api.data.BlockTileType
import org.hexworks.zircon.api.data.Tile
import org.hexworks.zircon.api.data.base.BaseBlock

class GameBlock(
    private var defaultTile: Tile = FLOOR,
    private val currentEntities: MutableList<GameEntity<EntityType>> = mutableListOf(),  // 1
) : BaseBlock<Tile>(
    emptyTile = Tile.empty(),
    tiles = persistentMapOf(BlockTileType.CONTENT to defaultTile)
) {

    val isFloor: Boolean
        get() = defaultTile == FLOOR

    val isWall: Boolean
        get() = defaultTile == WALL

    val isEmptyFloor: Boolean                                       // 2
        get() = currentEntities.isEmpty()

    val entities: Iterable<GameEntity<EntityType>>                  // 3
        get() = currentEntities.toList()

    fun addEntity(entity: GameEntity<EntityType>) {                 // 4
        currentEntities.add(entity)
        updateContent()
    }

    fun removeEntity(entity: GameEntity<EntityType>) {              // 5
        currentEntities.remove(entity)
        updateContent()
    }

    private fun updateContent() {                                   // 6
        val entityTiles = currentEntities.map { it.tile }
        content = when {
            entityTiles.contains(PLAYER) -> PLAYER                  // 7
            entityTiles.isNotEmpty() -> entityTiles.first()         // 8
            else -> defaultTile                                     // 9
        }
    }
}
If you are puzzled by what these
get()s are in the code then feel free to peruse the relevant documentation page. We’ll use getters like this throughout the tutorial.
What we changed is:
- We added
currentEntitieswhich is just a mutable list ofEntityobjects which is empty by default - We add a property which tells whether this block is just a floor (similar to
isWall) - Exposed a getter for entities which takes a snapshot (defensive copy) of the current
entities and returns them. We do this because we don’t want to expose the internals of
GameBlockwhich would makecurrentEntitiesmutable to the outside world - We expose a function for adding an
Entityto our block - And also for removing one
- Incorporated our entities to how we display a block by
- Checking if the player is at this block. If yes it is displayed on top
- Otherwise the first
Entityis displayed if present - Or the default tile if not
In our World class we’re going to need to add functions for adding entities, and also for finding empty positions where we can add them. The upgraded World class looks like this:
package com.example.cavesofzircon.world

import com.example.cavesofzircon.blocks.GameBlock
import com.example.cavesofzircon.extensions.GameEntity
import com.example.cavesofzircon.extensions.position
import org.hexworks.amethyst.api.Engine
import org.hexworks.amethyst.api.entity.Entity
import org.hexworks.amethyst.api.entity.EntityType
import org.hexworks.cobalt.datatypes.Maybe
import org.hexworks.zircon.api.builder.game.GameAreaBuilder
import org.hexworks.zircon.api.data.Position3D
import org.hexworks.zircon.api.data.Size3D
import org.hexworks.zircon.api.data.Tile
import org.hexworks.zircon.api.game.GameArea

class World(
    startingBlocks: Map<Position3D, GameBlock>,
    visibleSize: Size3D,
    actualSize: Size3D
) : GameArea<Tile, GameBlock> by GameAreaBuilder.newBuilder<Tile, GameBlock>()
    .withVisibleSize(visibleSize)
    .withActualSize(actualSize)
    .build() {

    private val engine: Engine<GameContext> = Engine.create()   // 1

    init {
        startingBlocks.forEach { (pos, block) ->
            setBlockAt(pos, block)
            block.entities.forEach { entity ->
                engine.addEntity(entity)                        // 2
                entity.position = pos                           // 3
            }
        }
    }

    /**
     * Adds the given [Entity] at the given [Position3D].
     * Has no effect if this world already contains the
     * given [Entity].
     */                                                         // 4
    fun addEntity(entity: Entity<EntityType, GameContext>, position: Position3D) {
        entity.position = position
        engine.addEntity(entity)
        fetchBlockAt(position).map {
            it.addEntity(entity)
        }
    }

    fun addAtEmptyPosition(
        entity: GameEntity<EntityType>,                         // 5
        offset: Position3D = Position3D.create(0, 0, 0),
        size: Size3D = actualSize
    ): Boolean {
        return findEmptyLocationWithin(offset, size).fold(
            whenEmpty = {                                       // 6
                false
            },
            whenPresent = { location ->                         // 7
                addEntity(entity, location)
                true
            })

    }

    /**
     * Finds an empty location within the given area (offset and size) on this [World].
     */
    fun findEmptyLocationWithin(offset: Position3D, size: Size3D): Maybe<Position3D> { // 8
        var position = Maybe.empty<Position3D>()
        val maxTries = 10
        var currentTry = 0
        while (position.isPresent.not() && currentTry < maxTries) {
            val pos = Position3D.create(
                x = (Math.random() * size.xLength).toInt() + offset.x,
                y = (Math.random() * size.yLength).toInt() + offset.y,
                z = (Math.random() * size.zLength).toInt() + offset.z
            )
            fetchBlockAt(pos).map {
                if (it.isEmptyFloor) {
                    position = Maybe.of(pos)
                }
            }
            currentTry++
        }
        return position
    }
}
What we changed:
- We added the
Engineto the world which handles our entities. We could have used dependency inversion here, but this is not likely to change in the future so we’re keeping it simple. - Also added the
Entitiesin the starting blocks to our engine - Saved their position
- Added a function for adding new entities
- Added a function for adding an
Entityat an empty position. This function needs a little explanation though. What happens here is that we try to find and empty position in ourWorldwithin the given bounds (offsetandsize). Using this function we can limit the search for empty positions to a single level or multiple levels, and also within a given level. This will be very useful later. - If we didn’t find an empty position, then we return with
falseindicating that we were not successful - Otherwise we add the
Entityat the position which was found. - This function performs a random serach for an empty position. To prevent seraching
endlessly in a
Worldwhich has none, we limit the maximum number of tries to 10.
This was our biggest change so far but now we are able to add entities to our blocks and find empty positions within our World!
Updating our Game
Our Game object was relatively simple so far. It only took a World as a parameter in its constructor and we had a handy factory method for this which created a World for us. Now it will also take our player Entity we just created:
package com.example.cavesofzircon.world

import com.example.cavesofzircon.attributes.types.Player
import com.example.cavesofzircon.extensions.GameEntity

class Game(
    val world: World,
    val player: GameEntity<Player>
) {

    companion object {

        fun create(
            player: GameEntity<Player>,
            world: World
        ) = Game(
            world = world,
            player = player
        )
    }
}
World will also come from the outside, we remove the usage of the WorldBuilder from here. What we’re using here is called the Dependency Inversion Principle which is very useful for creating abstraction boundaries in our program.
The TL;DR for DIP is this: By stating what we need (the
Worldhere) but not how we get it we let the outside world decide how to provide it for us. This is also called “Wishful Thinking”. This kind of dependency inversion lets the users of our program inject any kind of object that corresponds to theWorldcontract. For example we can create an in-memory world, one which is stored in a database or one which is generated on the fly.Gamewon’t care! This is in stark contrast to what we had before: an explicit instantiation ofWorldby using theWorldBuilder.
It seems that we are going to need a class which encapsulates creating a new Game from scratch, and which can be used from all these views, the GameBuilder:
package com.example.cavesofzircon.world

import com.example.cavesofzircon.GameConfig
import com.example.cavesofzircon.GameConfig.LOG_AREA_HEIGHT
import com.example.cavesofzircon.GameConfig.SIDEBAR_WIDTH
import com.example.cavesofzircon.GameConfig.WINDOW_HEIGHT
import com.example.cavesofzircon.GameConfig.WINDOW_WIDTH
import com.example.cavesofzircon.GameConfig.WORLD_SIZE
import com.example.cavesofzircon.attributes.types.Player
import com.example.cavesofzircon.builders.EntityFactory
import com.example.cavesofzircon.builders.WorldBuilder
import com.example.cavesofzircon.extensions.GameEntity
import org.hexworks.zircon.api.data.Position3D
import org.hexworks.zircon.api.data.Size3D

class GameBuilder(val worldSize: Size3D) {          // 1

    private val visibleSize = Size3D.create(        // 2
        xLength = WINDOW_WIDTH - SIDEBAR_WIDTH,
        yLength = WINDOW_HEIGHT - LOG_AREA_HEIGHT,
        zLength = 1
    )

    val world = WorldBuilder(worldSize)             // 3
        .makeCaves()
        .build(visibleSize = visibleSize)

    fun buildGame(): Game {

        prepareWorld()

        val player = addPlayer()

        return Game.create(
            player = player,
            world = world
        )
    }

    private fun prepareWorld() = also {             // 4
        world.scrollUpBy(world.actualSize.zLength)
    }

    private fun addPlayer(): GameEntity<Player> {
        val player = EntityFactory.newPlayer()      // 5
        world.addAtEmptyPosition(
            player,                                 // 6
            offset = Position3D.create(0, 0, GameConfig.DUNGEON_LEVELS - 1), // 7
            size = world.visibleSize.copy(zLength = 0)
        )                                           // 8
        return player
    }

    companion object {

        fun create() = GameBuilder(
            worldSize = WORLD_SIZE
        ).buildGame()
    }
}
Hey, what’s this
alsothingy?alsohere is a scoping function. You can read more about them here. The TL;DR is thatalsocreates a scope where we can invoke functions on the scoped object (the newGameBlockhere) and after that the scoped object is returned. This is very useful for initializing objects after creation as you can see here.
Here we:
- Take the size of the
Worldas a parameter - We define the visible size which is our viewport of the world
- We build our
Worldhere as part of theGame prepareWorldcan be called with method chaining here, sincealsowill return theGameBuilderobject- We create the player entity here since we’re going to pass it as a parameter to other objects
- We immediately add the player to the
Worldwhich takes anoffsetand asizeas a parameter offsetdetermines the position where the search for empty positions will start. Here we specify that the top level will be searched starting at (0, 0)- And we also determine that we should search only the throughout the viewport. This ensures that the player will be visible on the screen when we start the game
We also need to modify the constructor of our PlayView to not create a Game, but use our builder instead:
import com.example.cavesofzircon.world.GameBuilder

// ...

class PlayView(
    private val grid: TileGrid,
    private val game: Game = GameBuilder.create(),
    theme: ColorTheme = GameConfig.THEME
) : BaseView(grid, theme) {
Now if we run our program we’ll something like this:
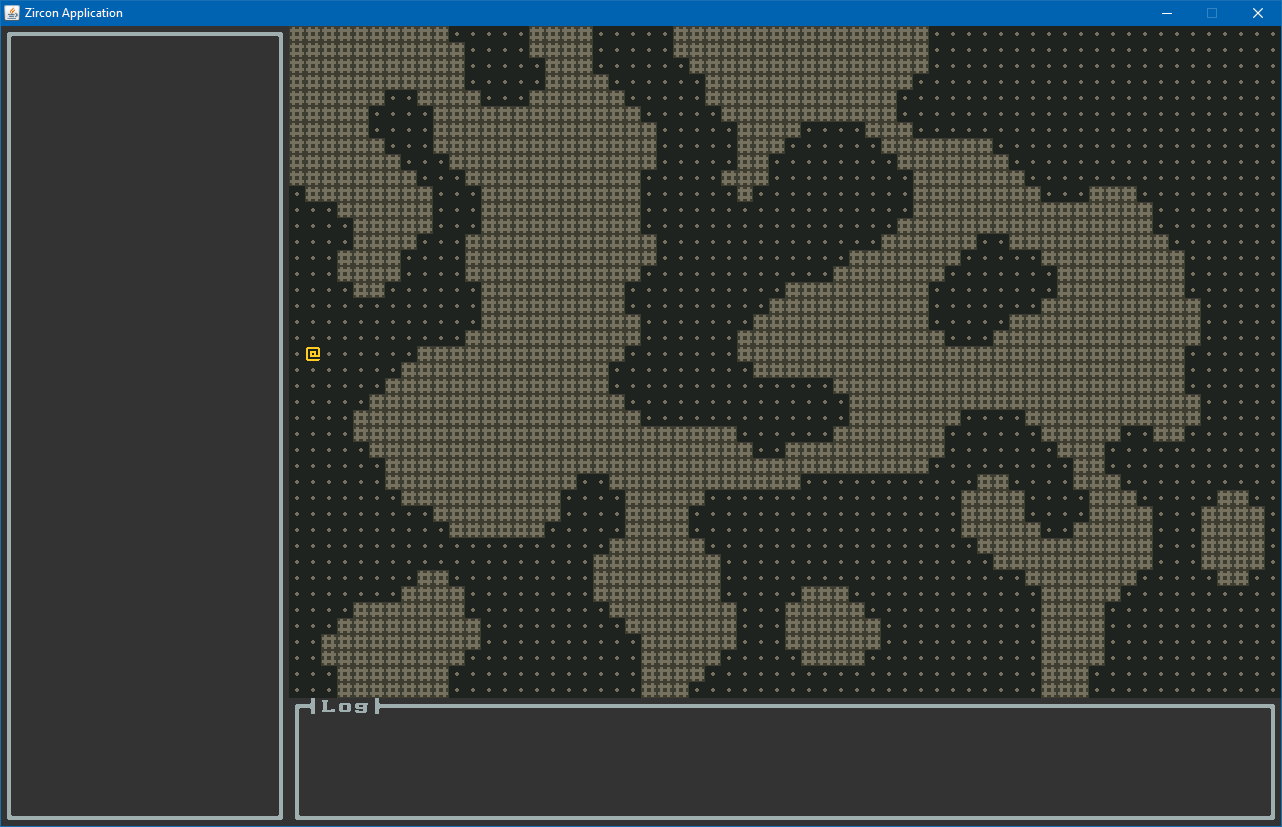
You might be thinking that we’ve written all this code for displaying a @ on the screen, but what we really
did is the plumbing for our porcelain.
Conclusion
Well done! Now we have a Player and we’ve also laid the groundwork to add even more things to our game easily. In the follow up articles we’ll add player movement and also some player actions, like digging into our game!
Until then go forth and kode on!
The code of this article can be found in commit #4.
Do you have questions? Ask us on our Discord Server.
If you like what we do and want to support us consider becoming a Patron.